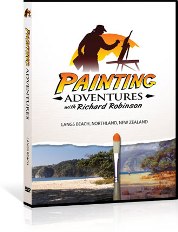
Setting a Horizon in Landscape Painting
Landscapes and their horizons have been an oil painting subject matter for a long time and a simple landscape is one of the easiest ways in which a new painter can break into an oil painting career. Learning to set horizons in oil painting is a daunting task to a novice painter. However, like with all other skills including preparation of oil painting colors, you learn this with time. Setting the horizon When defining a horizon, the best proportion to divide the canvas is about 5:8, this is a basic ratio that you will find everywhere in nature. There are simple ways to do this and mostly they depend on the laws of perspective. Apparently, things become smaller as one moves the eye further down the horizon. When an average person is standing on flat ground, they can see approximately three miles up to the horizon, with the first mile taking up a major part of the foreground. To get a realistic effect, you need to be careful and define the size and height of the landscape objects near the horizon. With this knowledge, you will ensure that the strokes at the bottom are bigger and then make them smaller as you move up the horizon. This can actually give you a great painting by simply concentrating on the idea of objects becoming smaller as they move up the horizon. How to paint a horizon in a landscape • You can work from a real landscape, a photo, or create something out of your imagination. However, try to keep it simple if this is your first time painting a horizon in landscape. You can think of a simple yet practical landscape like the sky or a grass field, where you can include some small hills and trees or a pond. • Paint the sky and the horizon line in the landscape painting using a medium brush with soft bristles. Paint in gray or blue halfway down the canvas and this becomes the horizon line. You can use varying colors depending on whether you want a clear or a stormy sky. Paint using sideways strokes with the brush. • Add some life in grass and hills to the landscape. By dipping a medium brush into dark green paint, apply this to the canvas in the same manner that you applied the sky colors. You can also add a little texture by dabbing a brush, which has paint on the grass and hills; this will make the texture rougher. • Then dip a medium brush into blue oil paint and dab this into the landscape close to the horizon on one side of the canvas to shape a small water body. • Using some light brown paint, you can apply it to the grass irregularly to add depth and shade to the grass and break up the solid green color. • Lastly, add some rocks to the background to break up the monotony. You can use two shades of brown or mix black and grey to give the rocks some life. Then finish off with a small number of pats of white paint intermingled into the skies above to create some delicate clouds. Alternatively, you can generate denser clouds by dabbing a brush loaded with paint on to the canvas. | |
|


Master the Colours DVD...

|
Although every attempt has been made to make information as accurate as possible, we are not responsible for any errors that may appear.
© Copyright 2015, OilPaintingTechniquesLessons.com. All Rights Reserved.


