Tips for Easy Oil Painting
Getting your oil painting exactly the way you want it is hard enough—you have to worry about color, texture, form, shadows, lighting, perspective, and proportion, among other things. In addition to these concerns, sometimes smaller problems crop up. Worrying about the small things just makes things more difficult. Maybe you have some nagging shoulder pain, or it takes you forever to decide how to compose a nature scene. Whatever your problems, following these five tips will make the process of oil painting a little bit more efficient and enjoyable. The hard part should be making the painting perfect, not all the little things in between. Here are some oil painting tips that will make life easier for you. 1. Get a good easel A good easel will make all the difference in your painting experience, because it will allow you to sit in a posture that won’t cause back or shoulder pain. There are many types of easels with different methods of adjustment. If you’re prone to accidents, an H frame easel might be better for you than an A frame as it remains steadier when knocked. The last thing you want is a wet oil painting falling face first onto the floor. 2. Organize your colors Create an organization system for the colors on you palette. Many artists like to use the order set up by the traditional rainbow spectrum: red, orange, yellow, green, blue, and purple. If you know where your colors are on the palette, you’ll be able to paint more quickly and not waste time searching the palette for your color every time you go back to it. 3. Make a color chart If you have trouble re-creating colors, try using a color chart. Get a big piece of paper and dab a circle of a color on it. Then pencil in the types of paint and proportions used to make it (one part cadmium red, two parts azo yellow, for example). This will help you make the colors again in the future and get a feel for how different amounts of different paints will change the color of a mixture. 4. Easy removal of paint caps If you haven’t used a tube of paint in a while, sometimes the paint around the rim dries and the cap gets stuck. This is something every artist will face at least once in their career. To prevent this, once you get the cap unstuck, (using pliers or rubber or running it under hot water) rub a bit of petroleum jelly around the ridges where the cap screws on. This will keep it lubricated so that the cap is less likely to stick in the future. 5. Use a Viewfinder When trying to paint an outdoor scene, a homemade viewfinder can be an enormous timesaver. Cut two L shapes out of cardboard and use them to represent the corners of your canvas. Hold them up to the scene and move them around, framing different aspects of it. This can help you decide what part you want to focus on for your painting and can be a big timesaver for just a little effort. It may help you see something you didn’t see before. | |
|


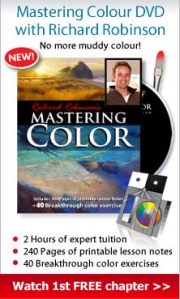
Master the Colours DVD...

|
Although every attempt has been made to make information as accurate as possible, we are not responsible for any errors that may appear.
© Copyright 2015, OilPaintingTechniquesLessons.com. All Rights Reserved.


