How to Select the Main Elements of a Photograph for Painting
Painting from a photograph is not always as straightforward as people think it would be. To start off, study your photograph. If it’s possible, have a large copy of it, so that you can get well acquainted with all of the little details, as well as the general feeling that you get from it. Blur or squint your eyes so that you can see where the areas of block shadow and color are, as well as the larger (and smaller, less obvious) shapes of objects are. Begin with the general shapes and lines of your photo and transfer these onto your canvas (make sure that your dimensions are correct). If you’re having difficulty finding the shapes and lines, then trace them on your photograph with a bold pen or marker so that they stand out and become more obvious to you. Remember that shadows and highlights also have shapes, so don’t leave these out of your painting. The lines in your photo don’t only include those that make up various shapes, but also the directional lines that draw your attention to different places. (Lines in perspective can give depth to an image while drawing your attention to something in particular. Even the texture in a brush stroke can seem to point to something. This can be used to your advantage, and should be.) The different shapes that you will find in your photo can include geometric shapes (circles, squares, triangles) and organic shapes (like that of a leaf, nose, puddle, etc). Build your palette by identifying the most obvious, striking colors in the photo. What color seems to dominate the painting? What colors are the subject and other objects made of? What colors are the shadows and highlights made of? Does the photo have complimentary colors in it? Are there a lot of neutral and natural colors, or bright ones? Try to find the different tints (a color mixed with white) and shades (a color mixed with black) that are used in individual objects, as well as in the overall painting. Are specific hues repeated in the photo? Do you want to use these, or change them a little bit? This would be perfectly acceptable with painting, especially if you want to portray a different mood from the one that the photo conveys. Find the focal point/s of your photograph. Pay attention to these while you paint, not shifting the focal points unless you consciously decide to do so. Note the different textures that you see in your photograph. Are surfaces rough or smooth? Are they dimpled or knotted? If you can’t get the textures right, try to find similar examples in real life. Feel different fabrics, the bark of a tree or the bumps in rough bricks. Try to draw and paint these textures from the solid examples that you find, and then go back to your photo and try again. Pay attention to the space that is created using perspective and different elements. Colors may be cooler in the background, getting warmer in the middle ground and even warmer in the foreground. Shadows, objects in front of other objects, and other elements can all create the illusion of space, so make sure that this comes through in your painting. | |
|


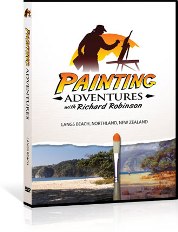
Master the Colours DVD...

|
Although every attempt has been made to make information as accurate as possible, we are not responsible for any errors that may appear.
© Copyright 2015, OilPaintingTechniquesLessons.com. All Rights Reserved.


